Spinnaker的认证
spinnaker 中提供了认证 ( Authentication) 的机制流为 Deck <=> Gate <=> Identity Provider
- Deck 是 spinnaker 的 WEB UI (由 apache server服务的一组静态文件)
- Gate 是 API Gateway,所有的进入 Spinnaker 的流量都会通过 Gate 处理,这里完成 authentication 和 authorization。
- Identity Provider:用于用户身份认证的外部服务或系统,例如 LDAP, OAuth 2.0(行业标准鉴权协议), SAML, X.509 等。
更多 spinnaker Authentication 工作流可以参考
Spinnaker 认证配置
启动配置
| |
使用 hal 命令配置 redirect URI
| |
或者手动修改配置配置文件
| |
这里 /login 后缀是 spinnaker 强制要求的
Be sure to include the
/loginsuffix at the end of the of yourpreEstablishedRedirectUri! [2]
用户映射配置
用户映射是将 spinnaker 用户字段映射为你的 Identity Provider 的用户的字段,例如如果你的 Identity Provider 字段如下所示
| |
那么你的用户映射应该配置如下
| |
一个完整的 keycloak 配置如下
| |
上门提到内部访问为 spinnaker 服务间调用;外部访问为,用户浏览器可以跳转到的地址
使用命令行配置上面的信息
| |
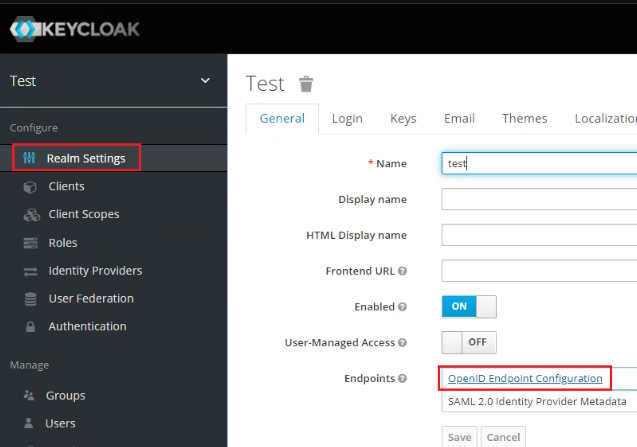
keycloak配置
创建一个 keycloak client,名字为 Spinnaker。
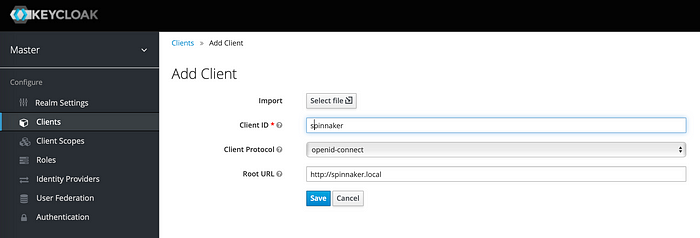
选择 openid-connect 作为客户端协议
Root URL should be our Spinnaker URL. When we click save, we will get a lot of other options to configure. Then we have to configure a Valid Redirect URI. This is the URI that Keycloak redirects users when the authentication is completed successfully. This should be our Spinnaker gate public URI.
下面配置他的跳转 URL,ROOT URL 是 Spinnaker URL, Valid Redirect URI 是在完成认证后,为用户重定向的 URI,通常配置为 ‘/*’

最后配置 Access Type 为 “confidential”,选择 “Credentials” 并配配置为 “client id and secret” ,这里的 secret 将用于上面 spinnaker 中的配置。
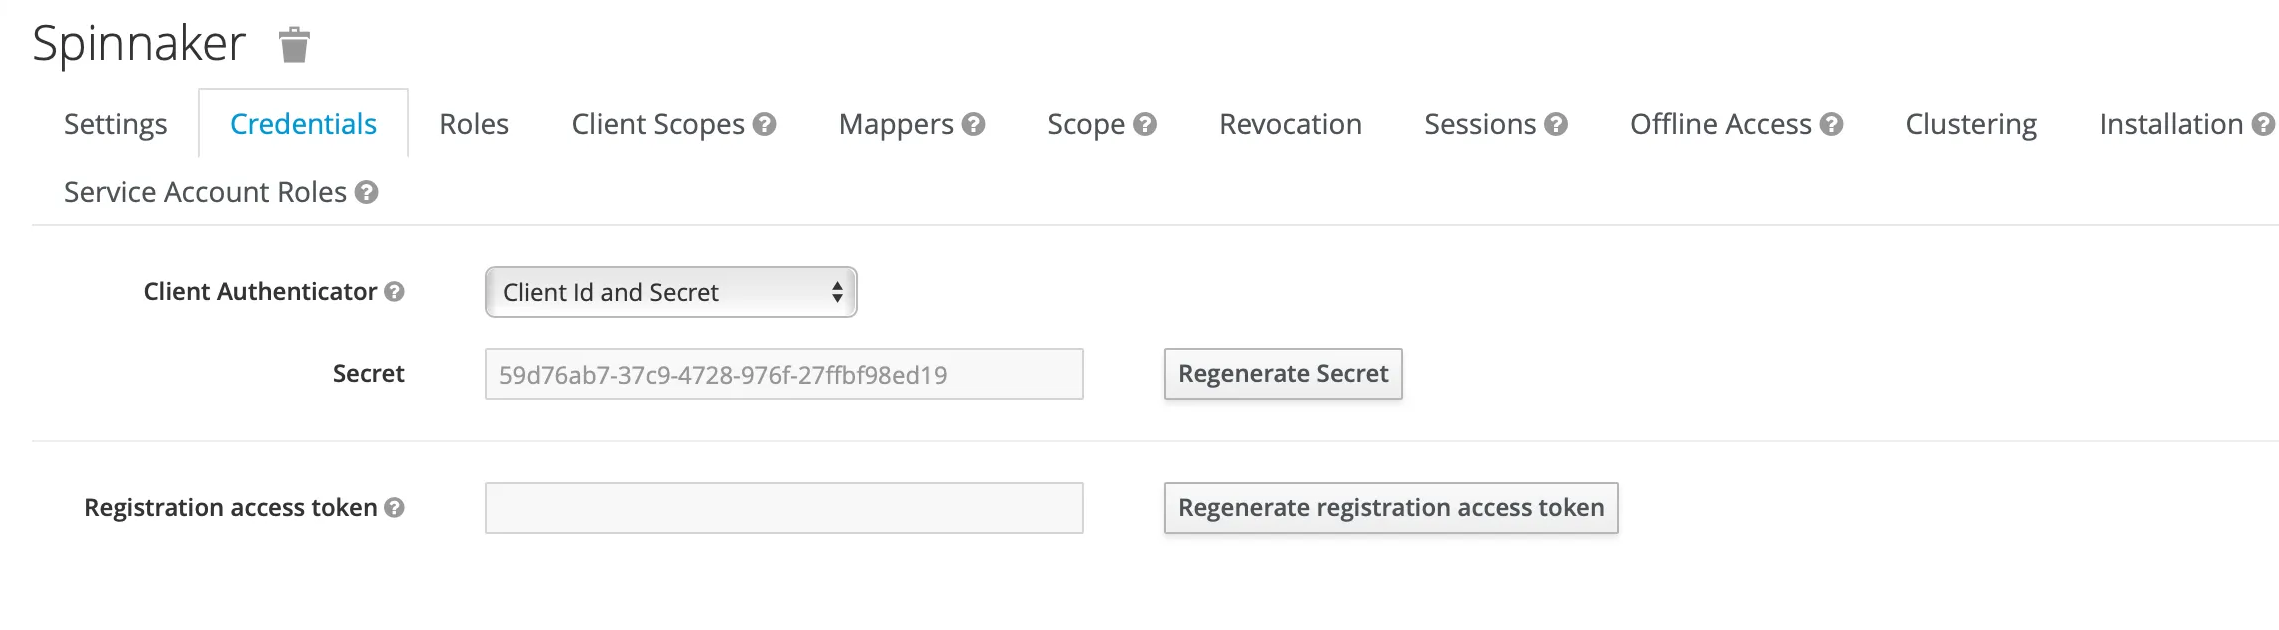
拷贝 “secret” 部分的“密钥”配置到 spinnaker中。
| |
Reference
[1] Authentication Architecture
[2] OAuth 2.0